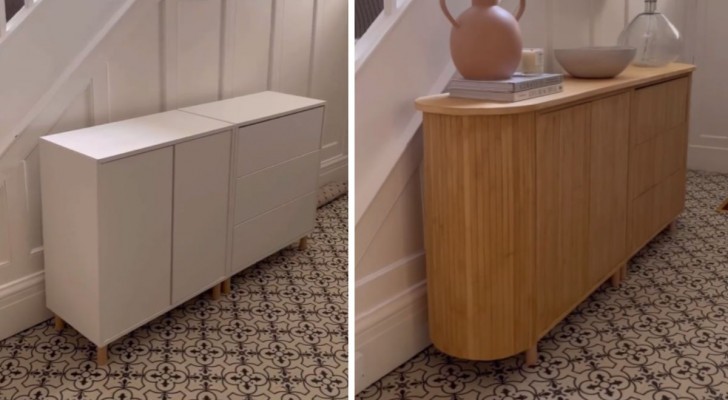
An IKEA hack: how to transform two Eket units into a refined foyer furniture unit
How many times have you imagined replacing your furniture, but you were unable to do this due to the expense? Have you ever thought about DIY as an alternative to buying ready-to-use furniture? Today, you don't need to be an expert carpenter to construct wonderful and perfectly functional furniture by yourself.
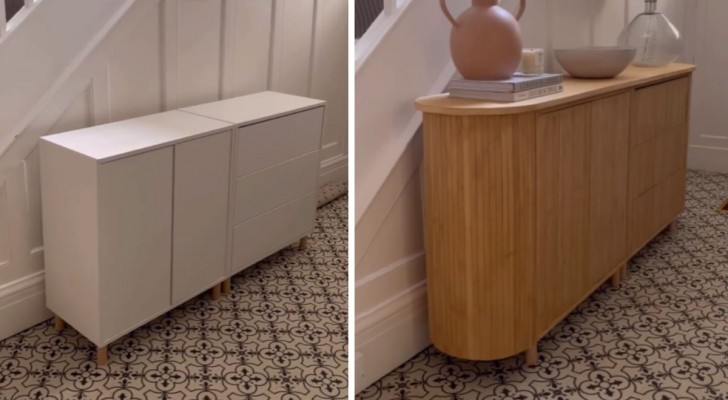
With a little creativity, in fact, you can make your home and your furniture unique and personalized, starting from using cheap and mass-produced furniture. Today, we show you a very simple project to transform two IKEA units from the Eket range into a wonderful piece of furniture for your foyer.
via crack_the_shutters/Instagram
For this transformation project you will need a few simple materials:
- two units of your choice from the Eket IKEA series. You can also carry out this project with more units, if you have enough space available in your foyer, or with a single unit, if space is very limited;
- bamboo panel, commercially available for covering walls; if you prefer you can buy the self-adhesive wallpaper panels, depending on your tastes;
- plywood top; buy it whole if you want to try your hand at cutting wood, but if you prefer, have pre-cut panels prepared to measure;
- acrylic paint in a color of your choice.
Making a this foyer entrance furniture can be done in a few simple steps:
- first of all, join together the two Eket units; you will find many different units available, from open shelves to cabinets with doors and drawers - you can choose your favorites depending on your needs;
- at this point, cut the plywood top creating 4 small semicircular shelves, whose diameter is equal to the depth of the Eket units;
- install the plywood tops at the two side ends of the cabinet;
- cut the bamboo panel to measure for your piece of furniture and glue it along the entire front and side surfaces;
- paint the entire piece of furniture with the chosen acrylic paint.
Your foyer will instantly look much more welcoming!
Check out the tutorial below for more information on the individual steps and remember: this is just a guideline, you will be able to customize this unit as you wish. Great work!
