Old T-shirts that you no longer use? You can turn them into cushion covers without having to sew anything
T-shirts are part of everyone's wardrobe: a garment with a very simple shape but which can have a thousand different styles (which also tells a lot about us). They are the type of garment that best lends itself to being decorated with script and images, so often it is the favorite product sold by a thousand companies, it becomes a travel souvenir. T-shirts can be used for practically any occasion: from any outfit to go out to elegant events, to pyjamas for sleeping.
So, we may happen to find a few T-shirts in the wardrobe that we no longer wear, but which we really care about: we don't need them stealing space in the drawers, but we don't want to get rid of them either. An excellent compromise to continue using them without wearing them, is to transform them into cushion covers.
There is no need to sew anything, in fact you will only need:
- T-shirts
- Cushions
- Scissors
- Sharpies (or sewing chalk)
- (optional) pins and tape, or some heavy object
The procedure to do this is really very simple, as you can see below:
- Choose a cushion, usually a square one, that is just a few centimeters smaller than the front of the chosen T-shirt.
- Equip yourself with a felt-tip pen/marker: an indelible one or those for fabric are fine. If you have sewing chalks, these are great too.
- Spread the shirt out on a flat surface, taking care to eliminate any wrinkles. If it helps, use weights or pieces of scotch tape to keep the fabric taut. Furthermore, to be sure that the two edges of the shirt match perfectly, you can use pins (placed on the edges), to keep the T-shirt taut.
- Place the cushion in the center of the T-shirt.
- With the marker or chalk, trace the outline of the cushion, but keeping it a bit wider: consider adding at least 3 or even 5 cm on each side. This will give you a square larger than the cushion itself.
- Make sure that the pins hold the T-shirt in place, and cut both sides of the T-shirt following the tracing you just drew on.
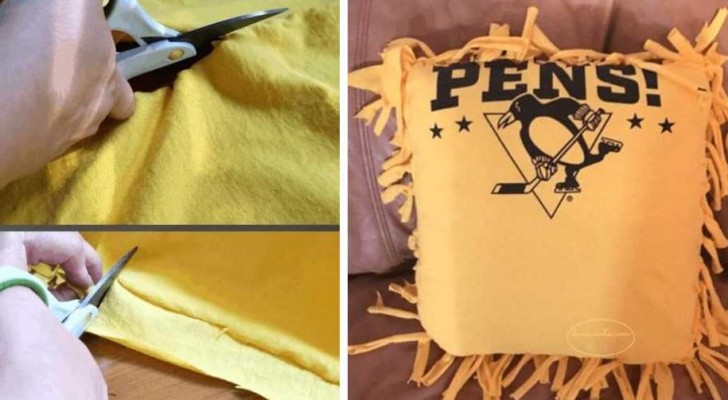
- Always taking care to keep the two squares of fabric just obtained properly aligned, start making cuts on each side to create fringes a couple of centimeters wide and that are as long as the excess of the square with respect to the actual dimensions of the cushion .
- When you're done, separate the two flaps of fabric (if you cut them simultaneously), and place the cushion on the inside piece of what used to be the back side of the shirt.
- Cover the cushion with the other flap, so that the front of the shirt is on the outside.
- Begin to tie each fringe of the upper flap in pairs with the corresponding one of the lower flap, and slowly you will close the two sides of fabric around the entire cushion.
This project is really easy and quick, and the result is super-cute! It will also be very easy to undo and put back these handmade pillowcases/cushion covers when you need to wash them!
Have you ever tried to make cushion covers this way?
