Grow a pistachio plant from the seed - it's easy and fun!
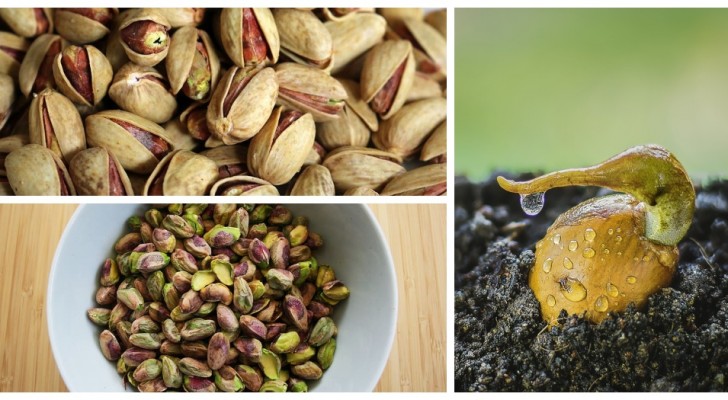
Pistachios are among the tastiest and most loved nuts in homes and kitchens all over the world: there are varieties that are grown in different countries and they really appeal to almost everyone. In fact, pistachios are used in the preparation of sweet and savory (salty) delicacies in many different cultures.
Their unmistakable color and slightly salty flavor, in fact, combine with many different tastes and make the various dishes they are added to much more spectacular. But, in fact, what we eat when we eat this nut, is the seed of the plant. And like any other seed, they can be germinated and grown into an adult pistachio plant. It is a fun experiment to do this and have the children participate. Find out how to do it by reading further:
A few necessary clarifications before you begin:
- For the pistachio plant to produce fruit, it will be necessary to have two plants, one female and one male, as is standard for many other species.
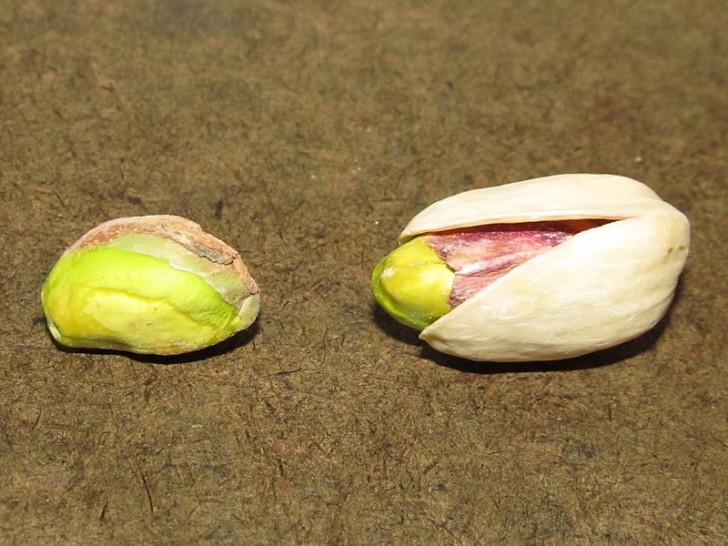
- Furthermore, not all the pistachios we eat are suitable for this experiment. In fact, we usually eat shelled ones as snacks, but they have been roasted and salted. This makes germination impossible.
Which pistachios should you use? You need to get the fresh ones that have a much milder flavor and are sold unshelled. These are nuts that have been simply picked and peeled, but not processed in any way, which are used in pastry and cooking. They can be found online, but also in well-stocked shops or supermarkets.
Having selected our nuts, we come to the procedure for growing a pistachio plant:
- Select the best pistachios for this procedure: they must be completely intact, and free from any cracks in their shells.
- Since the germination rate of pistachios is not very high, you should choose at least a dozen (or more).
- Put them in a small bowl with water, where they should soak for 24 hours.
- Prepare a germination tray (an old pan is fine for this), filling it with a layer of high quality potting soil. We recommend one that has coconut fiber - which is much more resistant to attacks by mold and insects thanks to its inert fibers.
- Cover the soaked nuts with a thin layer of soil
- Place the entire tray in an airtight plastic bag. Failing that, cover them well with cling film, creating a greenhouse effect.
- Check the condition of the tray every two or three days, possibly sprinkling a little water to keep it moist. The substrate must not be soaked.
- After 4 days, you should see sprouts, which will grow out within the next two weeks.
- At this point, prepare jars / pots of soil mixed with perlite, and place the seeds that have sprouted (and are not spoiled by fungi or rot) into the soil.
- When small leaves are visible, move to larger pots.
Other tips:
- Some puts the seeds in a fridge for 4 weeks to stimulate germination, before sowing them at room temperature, especially if they live in very hot climates.
- Instead of soil, you can also germinate the seeds using toilet paper or cotton wool: complete the processe up to (and including) step 3. Then take a large plastic jar with a lid, put some paper in it, sprinkle water to wet it (it must not be soaking) and place the seeds in it. Then cover with more paper, wet that too, and close the lid.
For more information, you can check out this video.